
Leaking Shower Floor Repair Sydney should do more than improve how the bathroom looks. A completed shower floor needs to manage water correctly, direct it toward the waste, protect the structure below and create neat, durable junctions around tiles, walls and the glass screen.
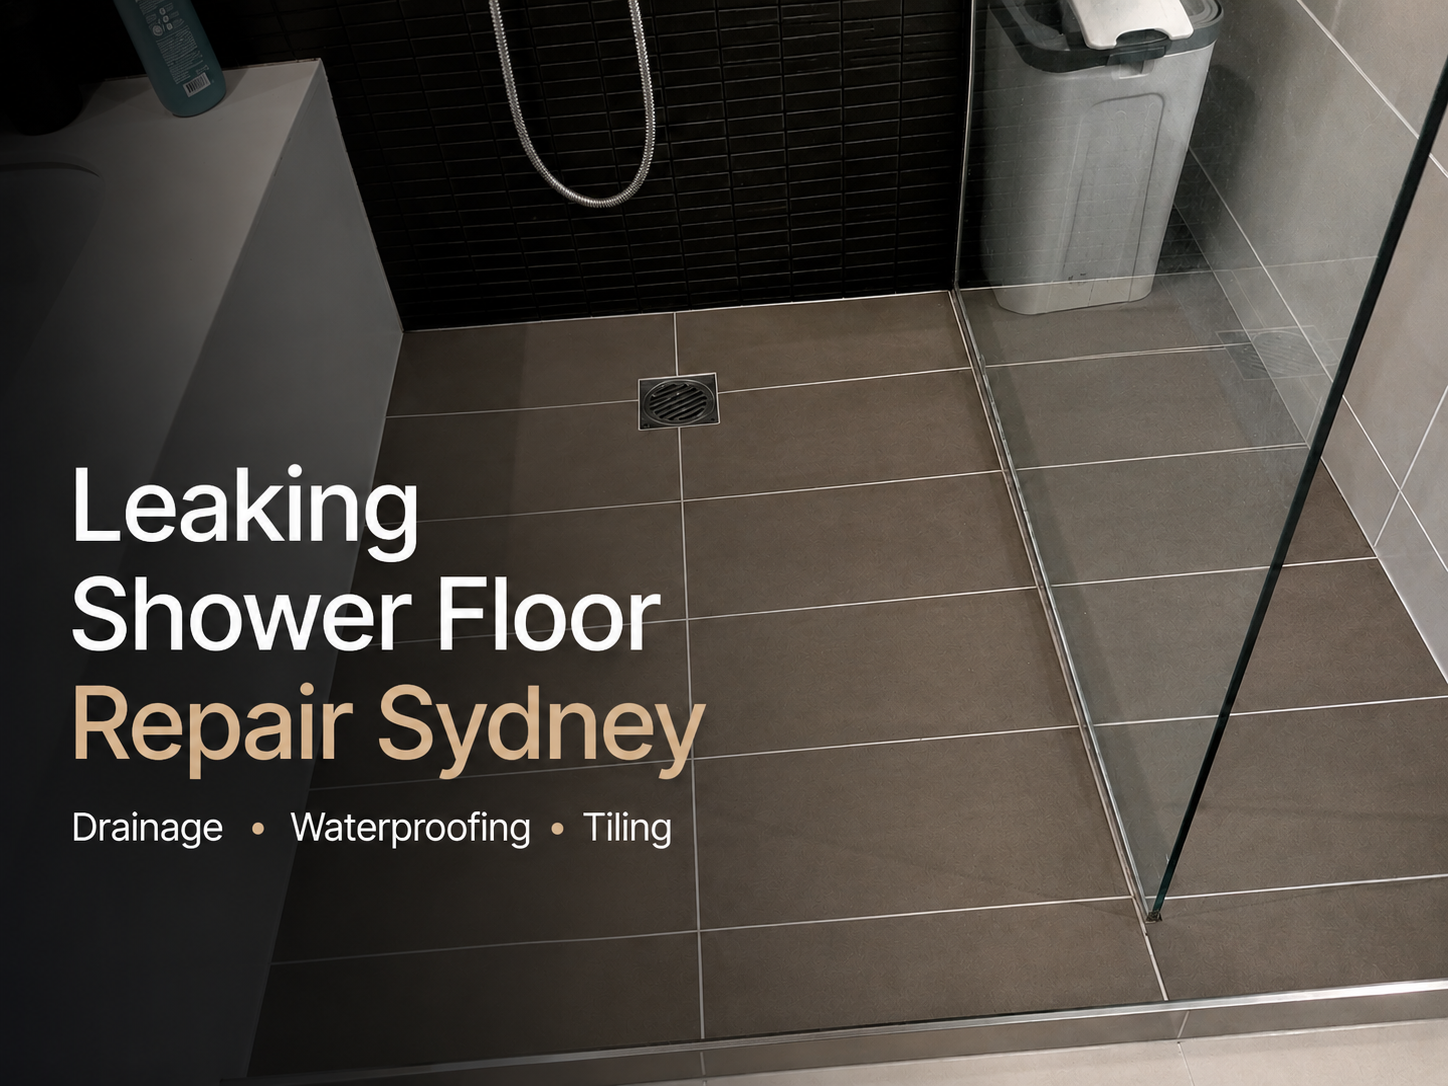
The project photo for this article shows a completed tiled shower floor with a square drain, clean grout lines and a frameless glass screen. It provides a useful example of the visible finishing stage after the damaged shower base has been repaired and retiled.
However, the finished tiles only show the top layer. The quality of a shower floor repair also depends on the preparation, substrate, drainage falls and waterproofing completed before the tiles went down.
Leaking Shower Repairs Sydney inspects and repairs leaking showers across Sydney. To arrange an on-site assessment, call 1300 119 805 or use the online contact form.
What the Completed Shower Floor Photo Shows
The supplied image shows a modern shower area after the visible repair work has been completed. The shower floor uses large dark-grey tiles with evenly spaced grout lines. A square waste sits within the tiled area, while the glass screen separates the shower from the surrounding bathroom floor.
The photograph also shows neat perimeter joints where the floor meets the tiled walls and shower screen channel. These details matter because corners, edges, penetrations and transitions often become weak points when installers rush preparation or sealing.
Although a photograph cannot confirm the condition of the hidden waterproofing, it can show whether the visible finish appears clean, coordinated and practical.
What Leaking Shower Floor Repair Sydney Should Achieve
A successful Leaking Shower Floor Repair Sydney should address the cause of the leak and restore the wet area as a working system. It should not simply cover old damage with new tiles.
A properly scoped repair may need to:
- identify how water escaped from the original shower
- remove damaged tiles, grout or screed where required
- repair or replace unstable substrate materials
- create suitable falls toward the shower waste
- detail the floor waste and plumbing penetrations
- restore the waterproofing membrane
- install suitable wet-area tiles
- apply grout consistently between the tiles
- seal flexible junctions with appropriate silicone
- allow each material to dry and cure correctly
The finished surface matters, but the hidden preparation usually determines whether the repair lasts.
Quick Shower Fix or Complete Floor Repair?
Not every leaking shower requires the entire floor to be removed. Some leaks come from isolated grout cracks, failed silicone or gaps around the shower screen. In those cases, a targeted surface repair may provide the right solution.
However, a complete shower floor repair may become necessary when water has reached the membrane, screed, substrate or floor-waste connection.
When a Quick Surface Repair May Work
A limited repair may suit the shower when:
- the tiles remain firmly bonded
- the floor drains without persistent ponding
- the leak comes from a clearly identified silicone joint
- only a small section of grout has deteriorated
- there are no major moisture signs outside the shower
- the waterproofing system remains sound
Where grout or joint failure causes the problem, professional bathroom grouting or bathroom sealing may provide a less disruptive solution.
When the Shower Floor May Need Rebuilding
A deeper repair may be more suitable when:
- tiles move or sound hollow when tapped
- water appears in a room beside or below the bathroom
- the grout cracks again after earlier repairs
- the floor holds water away from the drain
- the shower base feels unstable
- the waterproofing membrane has failed
- the waste connection allows moisture into the base
- previous silicone and grout repairs did not stop the leak
In these situations, another surface patch may delay the correct repair while hidden moisture continues to affect the bathroom.
Why Drainage Falls Matter in Shower Floor Repairs
A shower floor needs to guide water toward the waste. The slope may appear subtle, but it plays an important role in everyday drainage.
If the floor lacks suitable falls, water may remain in corners, collect beside the glass screen or keep grout lines wet for long periods. Persistent moisture can contribute to staining, mould and premature joint deterioration.
Before installing new tiles, the repair team should assess the shower base and correct significant drainage problems included within the repair scope.
Signs the Shower Floor Is Not Draining Properly
Common drainage warning signs include:
- water pooling away from the waste
- wet corners long after the shower has been used
- water travelling toward the bathroom floor
- dark grout that takes a long time to dry
- mould repeatedly developing in one area
- standing water around the shower screen channel
Ponding does not automatically prove that the waterproofing has failed. Nevertheless, it shows that the shower floor needs assessment.
The Role of Waterproofing Beneath the Finished Tiles
Tiles and grout help create a durable shower surface, but the waterproofing membrane protects the structure beneath them. Once the tiles are installed, homeowners can no longer see this layer.
That is why a complete Leaking Shower Floor Repair Sydney may involve more work than the finished photo reveals.
The waterproofing stage can include:
- cleaning and preparing the base
- repairing cracks, voids or unstable materials
- priming the surface where the system requires it
- reinforcing floor-to-wall junctions
- detailing the area around the floor waste
- applying the compatible membrane system
- allowing the membrane to cure before tiling
For more information about this hidden protective layer, visit the bathroom waterproofing Sydney service page.
The National Construction Code includes wet-area provisions intended to protect building elements from water and moisture. General information is available through the NCC waterproofing guidance.
What a Quality Tiled Shower Floor Should Look Like
A completed shower floor should combine practical drainage with a tidy visual finish. The exact tile size, colour and layout will differ between bathrooms, but several details remain important.
Consistent Tile Alignment
The tiles should follow a planned layout with clean lines and controlled cuts around edges and the waste. Poor tile placement can make the floor look uneven and may complicate drainage.
Neat Grout Lines
Grout joints should appear consistent across the shower floor. Missing, cracked or shallow sections may allow moisture and contaminants to settle within the joints.
Grout itself does not replace waterproofing. However, well-finished grout supports the tiled surface and makes the shower easier to maintain.
Detailed Perimeter Joints
The junctions where walls meet the floor need suitable flexible sealing where required. These areas handle movement differently from the field of tiles.
Rigid grout used in the wrong junction can crack as materials move. Proper joint selection helps the visible surface perform more reliably.
Careful Finishing Around the Waste
The tiles around the floor waste should sit neatly and direct water toward the opening. Awkward cuts, raised edges or low areas can trap water around the drain.
Professional bathroom tiling in Sydney should consider appearance, drainage behaviour and the wet-area layers beneath the tiles.
The Shower Floor Repair Process
Every shower has a different construction and leak cause. However, a deeper floor repair usually follows several key stages.
1. Leak Inspection and Diagnosis
The technician checks grout, silicone, tile movement, wall junctions, drainage, penetrations and signs of moisture outside the shower.
Professional shower leak detection helps determine whether the floor, walls, screen, plumbing or waterproofing may be contributing to the problem.
2. Removing the Affected Materials
The team removes the tiles and other damaged materials included in the approved scope. This process exposes the shower base so the technician can assess hidden deterioration.
3. Repairing the Base and Drainage
The substrate or screed may require repairs before waterproofing begins. Where required, the team also forms or improves the falls toward the floor waste.
4. Restoring the Waterproofing
The repairer prepares the surface, details the critical junctions and applies the selected membrane system. The materials must receive the required drying and curing time.
5. Installing the New Shower Floor Tiles
After the waterproofing stage, the team lays the new tiles according to the planned set-out and drainage falls.
6. Grouting, Sealing and Handover
The repairer completes the grout and flexible seals, cleans the work area and explains when the shower can safely return to use.
NSW provides current guidance about licensing requirements for applicable residential waterproofing work. Homeowners can review the NSW waterproofing work information.
How to Check a Completed Shower Floor Repair
Before the final handover, homeowners can ask several useful questions:
- What caused the original leak?
- Which tiles and materials were removed?
- Did the substrate or screed require repair?
- Was waterproofing included in the scope?
- How was the floor waste detailed?
- Were the drainage falls checked?
- When can the shower be used again?
- What cleaning products should be avoided?
- What documentation applies to the work?
A clear handover helps the homeowner understand both the visible result and the hidden repair work.
How to Care for the Repaired Shower Floor
Proper maintenance helps protect the completed repair and keeps the shower looking clean.
After the repair:
- follow all curing instructions before using the shower
- keep the bathroom ventilated during and after use
- remove standing water where practical
- clean tiles and grout with suitable mild products
- avoid harsh scrubbing tools on seals and grout
- watch for new gaps, cracks or loose tiles
- arrange an inspection if damp smells or stains return
Do not assume that every dark grout line means the shower is leaking. Soap residue, poor ventilation and regular moisture can also affect appearance. However, recurring damage deserves professional assessment.
Why Choose Leaking Shower Repairs Sydney?
Leaking Shower Repairs Sydney provides leak detection, shower floor repairs, waterproofing, tiling, grouting and sealing across Sydney.
The team follows a cause-focused process:
- inspect the bathroom and likely leak pathways
- explain the findings clearly
- recommend targeted or deeper repairs where appropriate
- provide a defined on-site scope and fixed quote
- complete the agreed preparation and repair stages
- offer practical maintenance and curing guidance
The licensed and qualified wet-area team holds Contractor Licence No. 272496C. You can learn more about the company on the About Us page.
Book Leaking Shower Floor Repair Sydney
If your shower floor holds water, tiles feel loose, grout keeps cracking or the bathroom still leaks after surface repairs, the shower base may need closer assessment.
For professional Leaking Shower Floor Repair Sydney, contact Leaking Shower Repairs Sydney.
Call: 1300 119 805
Website: Leaking Shower Repairs Sydney
Google Business Profile: View Leaking Shower Repairs Sydney on Google
Booking: Request an inspection or fixed quote
Frequently Asked Questions
What does a leaking shower floor repair involve?
The repair may involve leak diagnosis, tile removal, substrate or screed repairs, waterproofing, retiling, grouting and sealing. The exact scope depends on what caused the leak.
Does every leaking shower floor need new tiles?
No. Some leaks come from isolated grout or silicone failure and may suit targeted repairs. Tile removal may become necessary when the membrane, substrate, drainage or tile bond has failed.
Why does water remain on my shower floor?
The floor may have inadequate falls, low spots or drainage obstructions. An inspection can determine whether the problem relates to the surface, waste or shower-base construction.
Can a completed shower floor still leak?
Yes. New-looking tiles do not guarantee that the hidden waterproofing and drainage details perform correctly. The underlying preparation remains essential.
How long should I wait before using a repaired shower?
The waiting period depends on the waterproofing, adhesive, grout and sealant systems used. Follow the repairer’s specific curing instructions before using the shower.
How do I book a shower floor inspection in Sydney?
Call Leaking Shower Repairs Sydney on 1300 119 805 or submit an enquiry through the online booking form.